


EUR
29,70 Excl. VAT
*
EUR
35,34 VAT included
*
250 item
(€ 0,14 / item)


Attention: For sensitive surfaces we recommend the washers with the article number 12489
Now supplied in a practical transport bucket
 The new tile leveling system - We make tile laying even easier!
This tile leveling system makes it even easier for you to lay tiles absolutely flat in any format, especially for large slabs. Fast, uncomplicated and inexpensive. Save time when laying large formats.
The new tile leveling system for the planned laying of porcelain stoneware, tiles and natural stone. Avoid overlaps and create a perfect joint pattern with the little reusable "helpers", the pulling hoods. The threaded tabs remain in the adhesive bed.
With just a few turns of the pulling hood, you can raise the laid tiles to the same level. The new tile leveling system works without further or additional tools.
You will be amazed at how quickly you can create an absolutely flat floor with this tile leveling system.
The joint width is determined by the 3 different types of threaded lugs, the basic threaded lug 2 mm, joint cross thread 2-4 mm and T-piece 2-4 mm, which are inserted under the tile in the adhesive and determine the joint width.
The threaded lugs are inserted under the tile during installation in the adhesive and brought to the desired level with a few turns using the pulling hoods. After the adhesive has hardened, the reusable pulling hoods are unscrewed. The threaded tabs remain in the adhesive and are broken off at the predetermined breaking point in the direction of the joint. The number of tabs required varies according to the different tile formats.
The threaded lugs of this tile laying system are no longer visible after grouting. This new tile levelling system works without additional tools and makes work easier for the professional tiler. An investment that pays off!
All the advantages of the tile leveling system at a glance:
 Art.no. 12450 Basic set black 2 - 12 mm tile thickness - 50 pulling hoods and 250 threaded lugs base
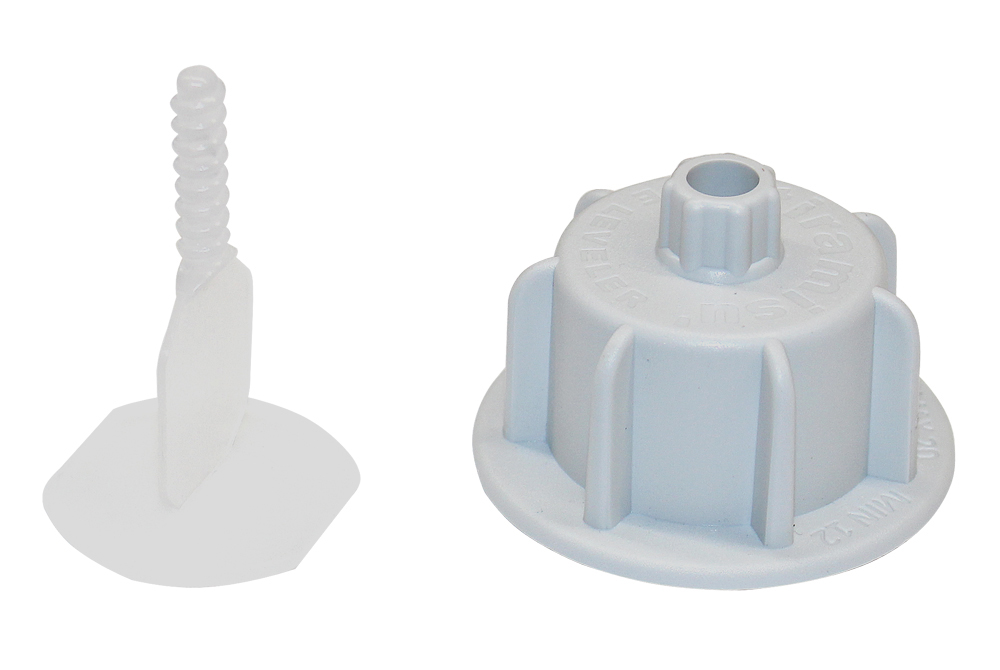 Art.no.12452 Basic set gray 12 - 20 mm tile thickness - 50 pulling hoods and 250 threaded lugs base

Step 1: Insert the threaded tabs under the tile in the tile adhesive

Step 2: Embed the tile in the adhesive. The leveling system tabs are now fixed in the joint

Step 3: Turn the pulling hoods onto the threaded lugs, level and allow the adhesive bed to harden

Step 4: Twist off the pull hoods, break off or step off the tab protrusion at the predetermined breaking point
If you have any questions about our leveling system, we will be happy to help you!
Tel.: 08667 878-0
info@dahm-werkzeuge.de


